
Most of my students are very familiar with code.org and have used it extensively to learn coding concepts in class. This introduction is for parents to be able to help students login and navigate around the website to complete puzzles. Each class has been setup in code.org with individual student accounts. There are 2 pieces of vital information not published here. They are: the class codes and each student’s secret picture. The secret picture acts as a simple password that is easier to remember than a normal text based password.
Step 1 – Navigate your browser to code.org
Click this link or the picture below: https://code.org

Step 2 – Sign in with class code
Click the sign in button as pictured above then enter the class code that should have been sent to you via ClassDojo or email. Class codes are always 6 letters that are non case-sensitive. The class code does not change for the whole year so if you have used code.org with the same browser (and device) it will usually remember previously entered values.


When you click the name of your student it should highlight with an orange background to indicate it has been selected. You should see their first name plus the first letter of their surname only.

If your student has forgotten their secret picture you will need to contact me. Email is best as the messages in ClassDojo can sometimes be hard to notice and therefore respond to in a timely manner. Most students are quite good at remembering this even if it has been a while since they last used it.
Step 3 – Student dashboard
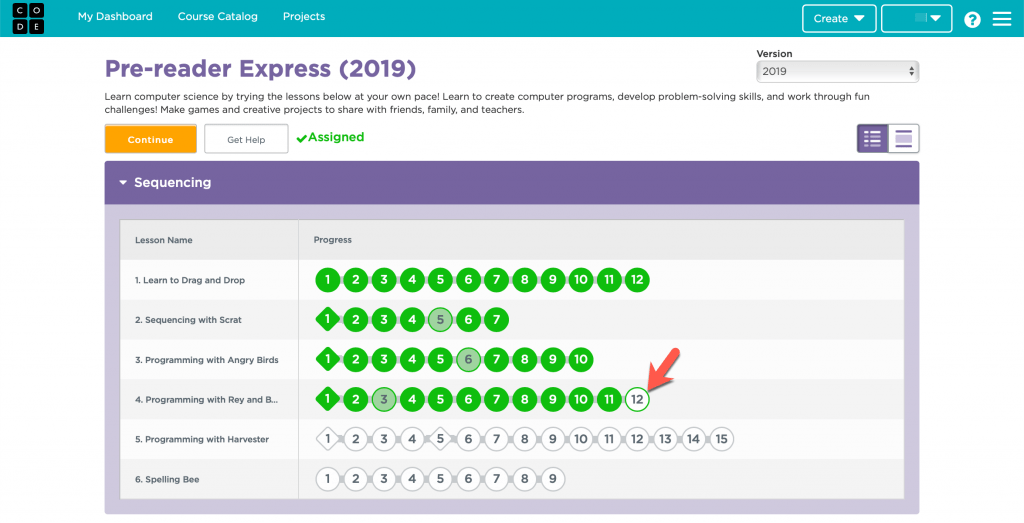
When you sign in successfully you should be immediately taken to the student dashboard which shows their progress through the currently assigned course.
The darker green circles indicate a puzzle that has been completed. The lighter green circles indicate a puzzle that has been started but not quite finished completely. A white circle indicates a puzzle that has not yet been started or has been reset.
This website allows students to work at their own pace and in the primary lab I would spend the bulk of the lesson helping individual students with whichever puzzle they are currently doing. Sometimes students may accidentally (or purposely) skip puzzles or whole lessons. They should be encouraged to do the puzzles in order as they get increasingly more difficult and skipping ahead may cause them to get stuck. This isn’t always the case though and they can always return to puzzles that might have been too challenging at a later time.


Step 4 – Completing coding puzzles


Step 5 – Take a break
Solving these puzzles is hard work. I would encourage students to only work on the for up to 30 minutes. If they get tired, frustrated or are struggling then please encourage them to take a break and come back to it when they are feeling better. Sometimes the best way to solve a problem is to walk away, do something relaxing and not think about it. A long walk has often helped me solve programming problems in minutes that I had been struggling with for hours.
0 Comments